Checking for Paper Skew
Do this check to confirm that the paper is not skewed in the paper path.
- Make sure that the I/F cable of the ring binder unit is connected.
- If the finisher is connected to the left side of the ring binder, separate it and pull it away from the left side of the ring binder. Do not disconnect the finisher.
- Execute a straight-through run (no ring binding, no punching) with A3 or DLT from Tray 2 of the host machine.
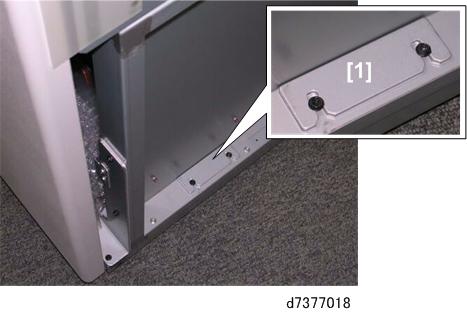
- During the run, each sheet of paper exits the side of the ring binder, as shown above.
- There are two scales on the left side of the ring binder below the paper exit.
- The rear scale [1] is for DLT-size paper and the front scale [2] is for A3-size paper. Be sure to read the correct scale for the paper size in use.
Check the position of the paper on the scale to determine if the paper skews as it exits.
- Read the rear scale for DLT-size paper and front scale for A3-size paper.
- The scale lines are spaced 2 mm apart.
- The paper must not deviate more than ±2 mm on the scale.
[A]
Centered. No adjustment necessary.
[B]
Trailing edge skew to the front, total skew more than ±2 mm. Adjustment required.
[C]
Trailing edge skew to the rear, total skew more than ±2 mm. Adjustment required.
Correcting Skew
- Disconnect the ring binder from the upstream unit.
- Remove the spacers [1] from the right side of the ring binder at the base (
x2).
- On the docking bracket attached to the upstream unit, loosen the screws.
- Insert a spacer and tighten the screws.
If the trailing edge is skewing toward the front of the machine, insert a spacer [B] under the rear end of the bracket and tighten the screws.
-or-
If the trailing edge is skewing toward the rear of the machine, insert a spacer [A] under the front end of the bracket and tighten the screws. - Do another run to check the adjustment. If skew is still present, insert another spacer.