- Braces, cushions, and screws removed from the machine for installation should be retained for reinstallation in the event that the bookbinder must be shipped to a new location.
- Remove all strips of tape and packing from the front and top.
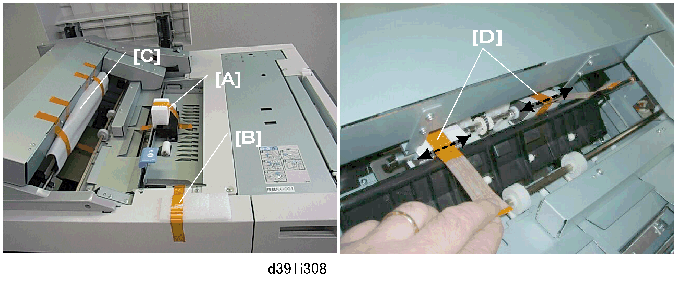
- Remove the tape [A].
- Pull out the glue supply drawer [B] and remove the long tape [C].
Left Side
- Remove the upper braces [A] and [B] (
x3 each)
Left Side
- Remove the lower braces [A], [B], [C] (
- Mark the two (large) upper braces "D".
- Mark the three (small) lower braces "H".
Rear
- At the rear, remove all tape (as shown) from the back, top, power cord and interface cable.
Right Side: Near Bottom
- Remove brace x1 [A], brace [B] x1 and tags (
- Mark the removed large brace "I" and mark the removed small brace "H".
Left Side
- Open the top cover [A].
- Remove the tape and cushions [B] and [C]. Slide the cushion at [C] down to remove it.
Front: Top
- Remove the tape and cushions [A], [B].
- Disconnect the tape at [C] then lower lever Mk4.
Carefully cut the strips of tape at [D] then remove the strips of tape and the cushions.
- Pulling on the strips of tape without cutting them could damage the roller shaft.
- Lower the top cover.