To prevent injury from electrical shock or damage to the machine, before installation always turn the main machine power off, and then unplug the machine power supply cord from the power source.
Removing the SPDF rear cover
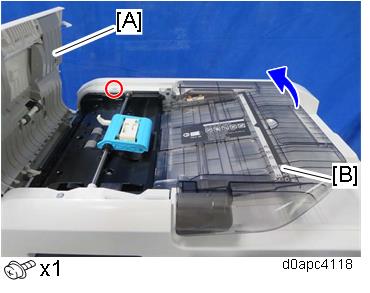
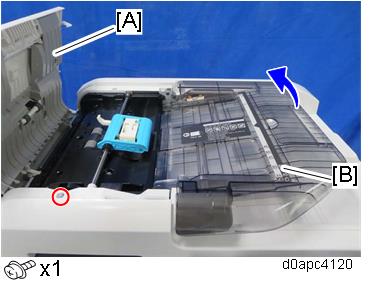
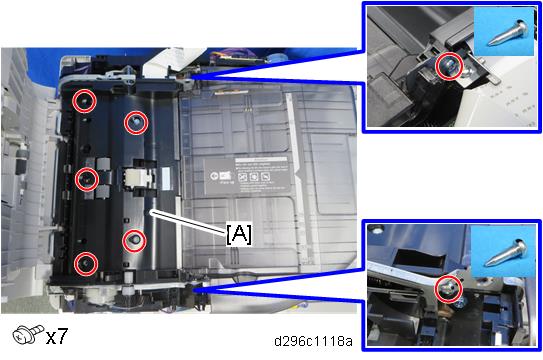
- Open the SPDF top cover [A].
- Remove the screw, and then lift up the original tray [B].
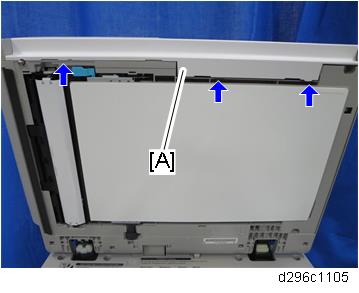
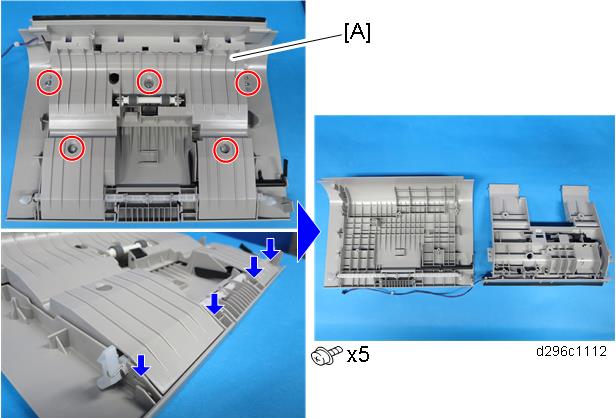
- Open the SPDF [A], and then release the five tabs of the SPDF rear cover by using a thin screwdriver.
- Remove the SPDF rear cover [A].
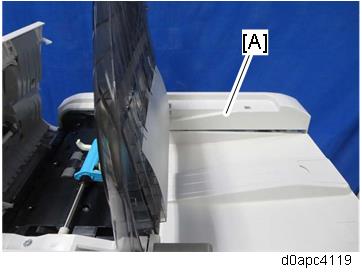
- Close the SPDF.
Removing the SPDF front cover
- Open the SPDF top cover [A].
- Remove the screw, and then lift up the original tray [B].
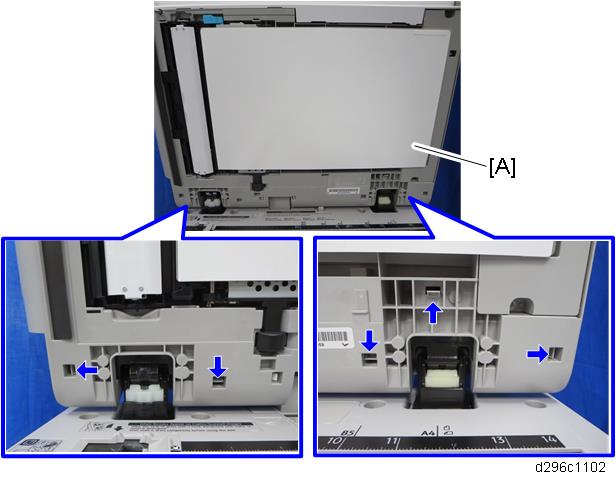
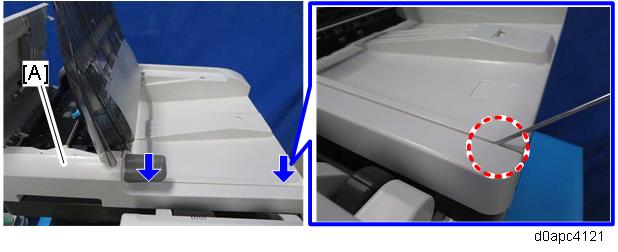
- Open the SPDF and then release the three tabs of the SPDF front cover [A].
- Close the SPDF slightly and then remove the SPDF front cover [A] while releasing the two tabs with a thin screwdriver.
Installing the double-feed sensor (emitter)
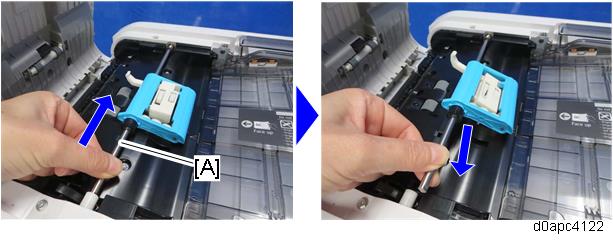
- Slide the shaft [A] of the original feed unit toward the rear to remove it.
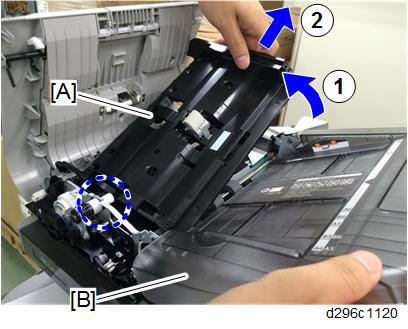
Remove the SPDF inner cover [A].

Lift the back of the SPDF inner cover [A] while swinging up the original tray [B], and then slide the SPDF inner cover toward the back of the SPDF unit.
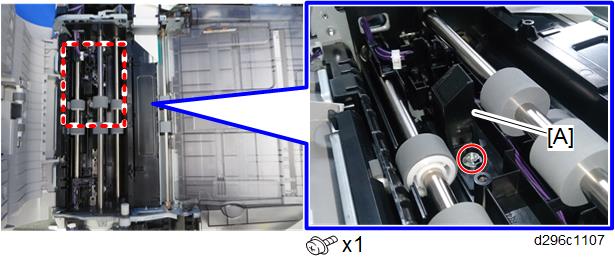
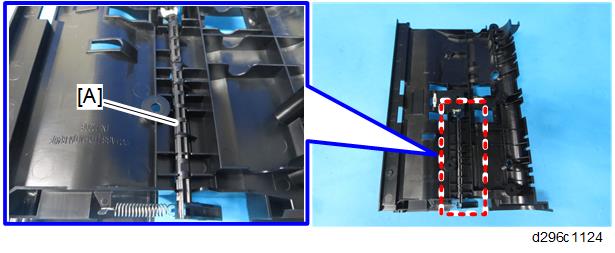
- Remove the guard [A].
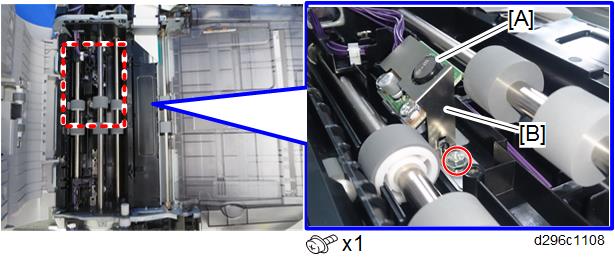
- Put the grounding plate [A] on the double-feed sensor (emitter) [B].
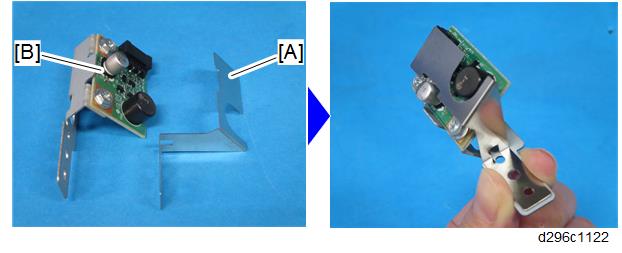
- Attach the double-feed sensor (emitter) [A] and grounding plate [B] as a set. (Tapping screw: 3x10)
Installing the double-feed sensor (receiver)
- Disconnect the harness [A] of the SPDF top cover [B] from SPDF relay board (CN5) and then release the clamp.
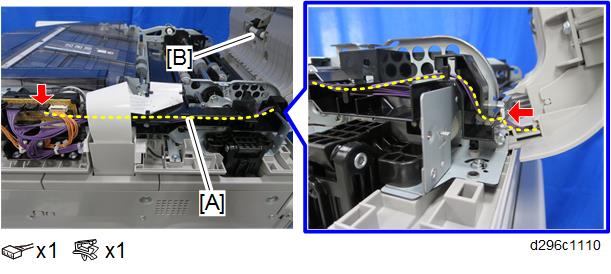
- Remove the harness [A] from the harness guide.
- Remove the SPDF top cover [A].
- Remove the five screws and release the four tabs, and then remove the inner cover [A].
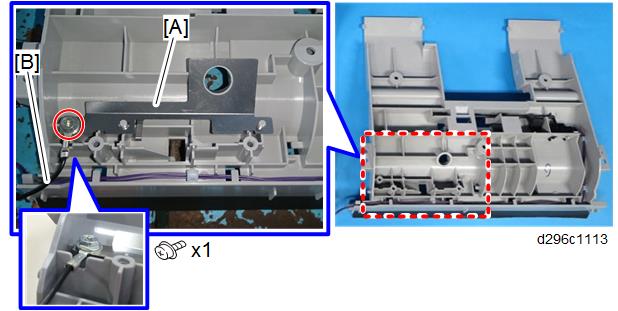
- Attach the grounding plate [A] and the grounding wire [B] and then insert the grounding wire in the notch. (Tapping Screw: 3x10)
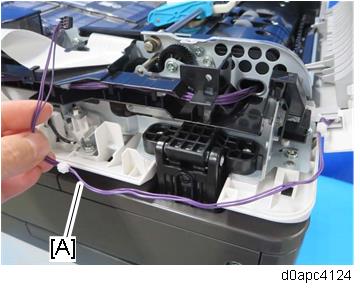
- Connect the long harness to the double-feed sensor (receiver) [A].
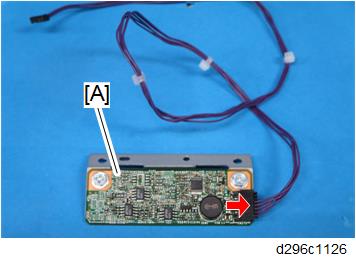
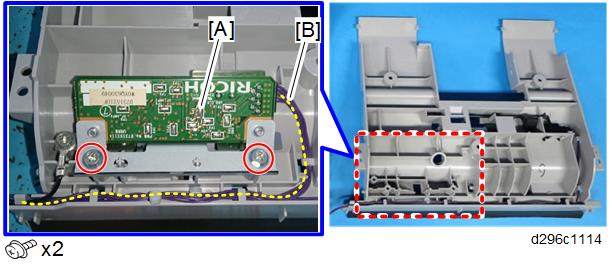
- Attach the double-feed sensor (receiver) [A]. (Tapping screw: 3x10)
- Route the harnesses [B].
Reattach the inner cover (
 x5), and then reattach the SPDF top cover (x1).
Make sure the SPDF top cover is set correctly so that the two tabs fit into the holes.
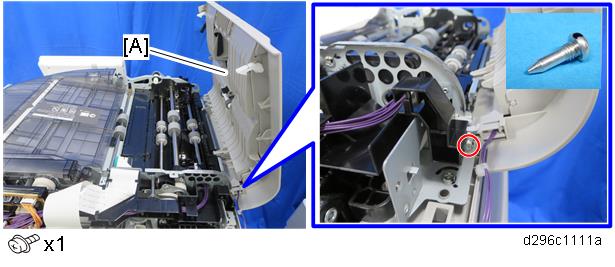
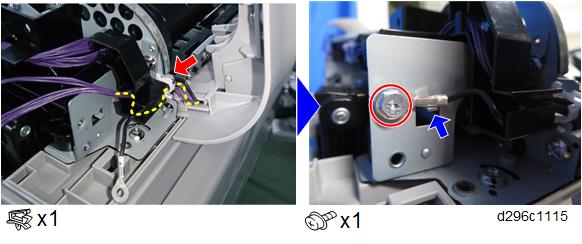
- Attach the clamp while the top cover is open, and then attach the ground wire while putting it on the guide (marked by the blue arrow). (Screw: M3x6)
Connecting the harnesses
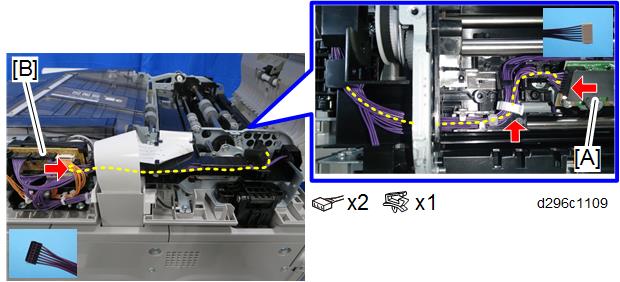
Connect the harness to the connector of the double-feed sensor (emitter) [A] and SPDF relay board [B] (CN3), and then route it.
Connect with attention to the connector colors.
- Double-feed sensor: White connector
- SPDF relay board: Black connector
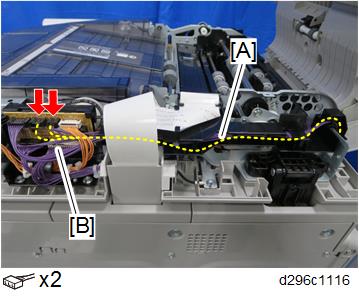
- Connect the harnesses [A] from the SPDF top cover to the connectors of the SPDF relay board [B] (CN5, CN6).
Reattach the covers and original feed unit.
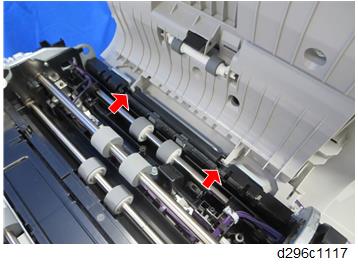
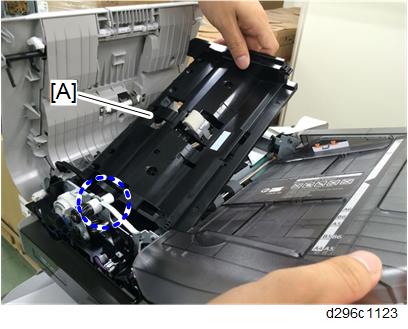
When reattaching the SPDF inner cover, make sure that the shaft [A] fits into the groove (this is the shaft of the lock lever for the friction pad on the back side of the cover). If the shaft does not fit, the SPDF top cover will not be closed.
When reattaching the SPDF inner cover [A], move it under the coupling shaft (marked by the dashed circle) of the original feed unit, and then you can install the SPDF inner cover correctly.
After installing the double-feed sensor
- Connect the power cord and turn ON the main power.
- Enter the SP mode.
- Set the SP6-040-001 (Page Keeper: Mount Select) to “1(ON)”.
- Press [END] twice.
- Turn the main power OFF and ON.
- Log in as Administrator.
- Press the "User Tools" icon.
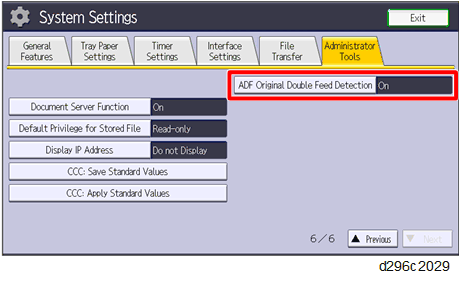
- Press [Machine Features] > [System Settings] > [Administrator Tools].
- Check that [ADF Optional Double Feed Detection] is displayed.