- Log in as the machine administrator from the operation panel.
- Press the [Settings] icon.
- Press [Machine Features Settings].
- Press [System Settings].
- Press the [Administrator Tools] tab.
- Press [Auto Erase Memory Setting].
- Press [On].
- Select the method of overwriting.
If you select [NSA] or [DoD], proceed to Step 11.
If you select [Random Numbers], proceed to Step 9. - Press [Change].
- Enter the number of times that you want to overwrite using the ten keys, and then press [#].
The Random Numbers method overwrites the data using random numbers. You can set the overwrite to be performed anywhere from 1-9 times, with a default of 3 times. - Press [OK].
- Log out.
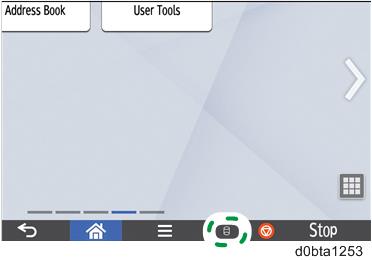
- Check the display and make sure that the Data Overwrite icon appears.
When Auto Erase Memory is enabled, the Data Overwrite icon will be indicated at the bottom of the panel display.
- Take a test copy, and then make sure that the Data Overwrite icon changes from "Dirty" (solid) to "Dirty" (blinking), and then to "Clear".
- If the Data Overwrite icon does not change to Clear, check to see if there are any active Sample Print or Locked Print jobs. A Sample Print or Locked Print job can only be overwritten after it has been executed.
- The Dirty icon blinks while the overwrite is in progress.
- If you use your machine for a while with Auto Erase Memory disabled, and then suddenly enable it, the overwrite process may take 10 or more hours depending on HDD usage.
Data Overwrite icon:
Icon
Icon name
Explanation

Dirty
This icon is displayed when there is temporary data to be overwritten, and flashes during overwriting.

Clear
This icon is displayed when there is no temporary data to be overwritten.