- Remove the right upper cover. (Right Upper Cover)
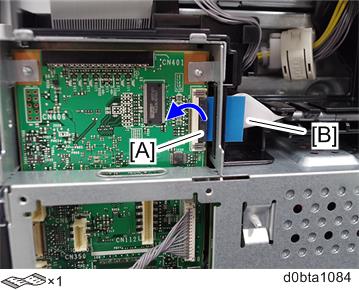
- Open the lock [A] and disconnect the flat cable [B].
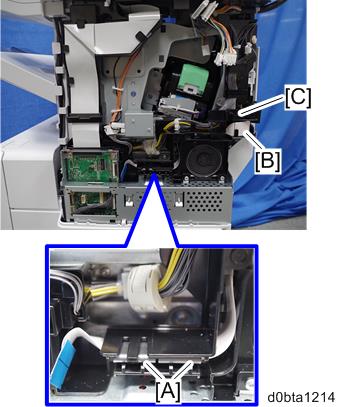
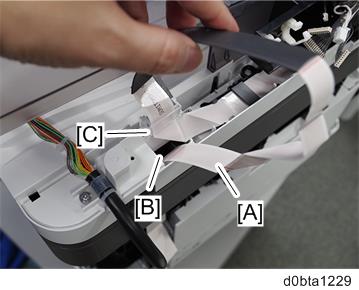
- Release the flat cable [A] from the harness guide [B] and remove the cores [C].
- Release the flat cable [A] from the harness guide [B] and remove the core [C].
- Remove the DF top cover assembly. (DF Top Cover)
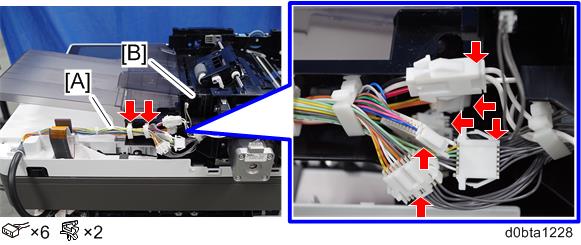
- Remove the harness [A] from the DF conveying unit [B].
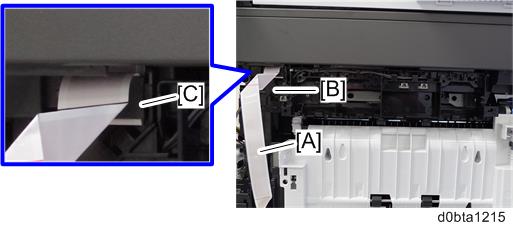
- Pull out the flat cable [A] from the hole [B].
- Remove the cover [C] and release the flat cable [A].
- Remove the DF conveying unit [A].
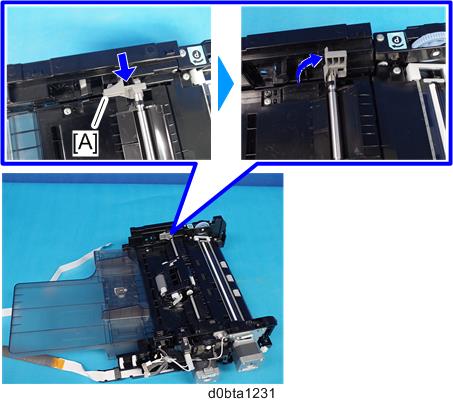
- Push the lock lever [A] and rotate it to the release position.
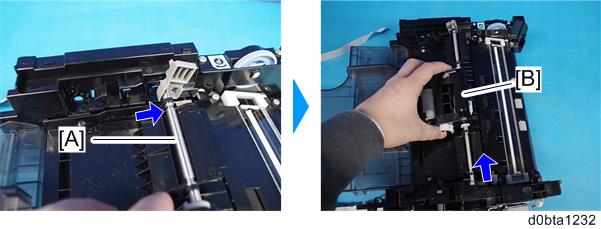
- Slide the machine front side of the DF feed roller shaft [A] toward the machine left side, and then pull out the DF paper feed roller unit [B].
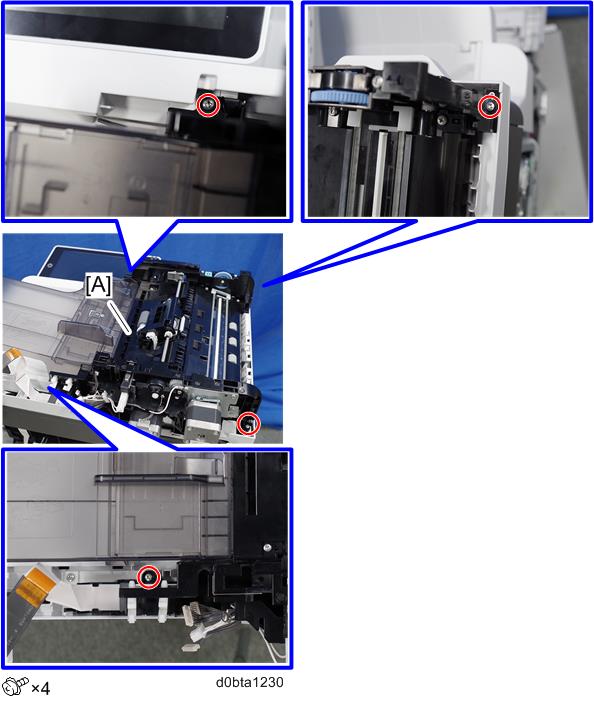
- Remove the jam release dial [A].
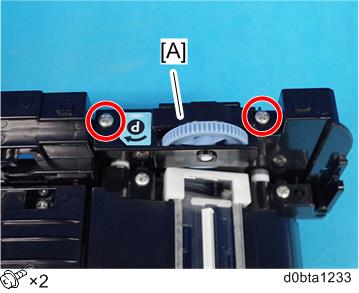
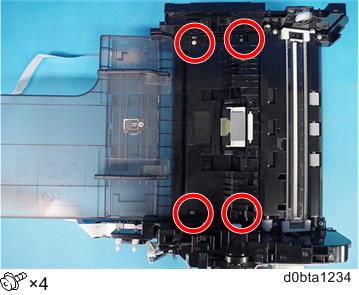
- Remove four screws.
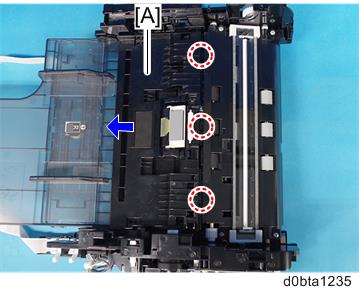
- Slide the conveying guide [A] in the direction of the arrow to release three hooks.
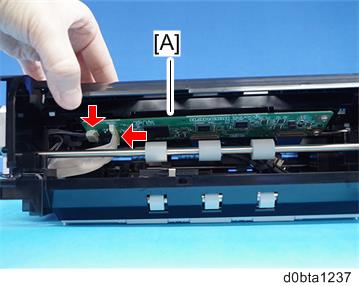
- Detach the CIS assembly [A].

- Disconnect two connectors from the CIS assembly [A].
- Release both two hooks [A] of the front glass holder [B] and rear glass holder [C] in the direction of the arrow and detach them.
Detach the CIS glass [D] and the front spacer [E] and rear spacer [F] from the CIS assembly [G].
Since the front and rear spacers are not fixed, take care not to lose them.
Check the position of black marking for the distinction of the front / back side of the glass.
Also, make sure not to touch the glass surface.
If it is dirty, wipe it off with a dry cloth.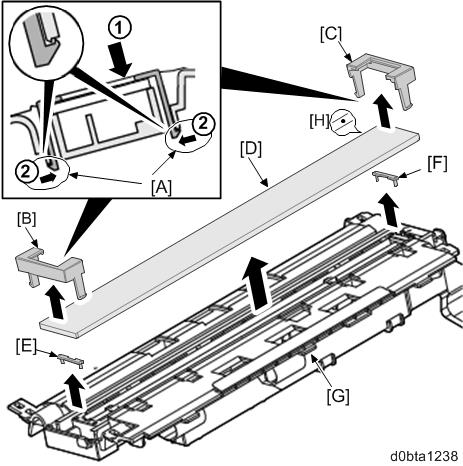
Detach the CIS [A] in the direction of the arrow.
Take care not to lose two springs [B].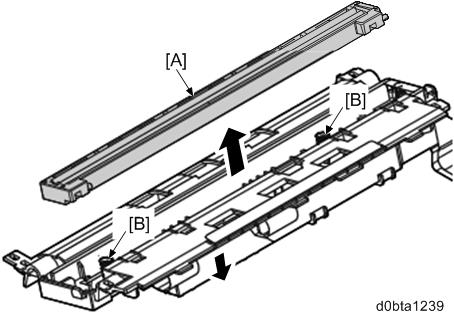
When reassembling, check that the spring is inserted on the boss of the CIS assembly.