
- Turn OFF the main power, and unplug the machine power cord before starting the following procedure.
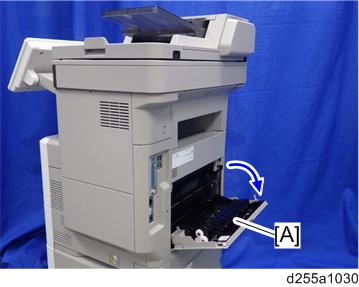
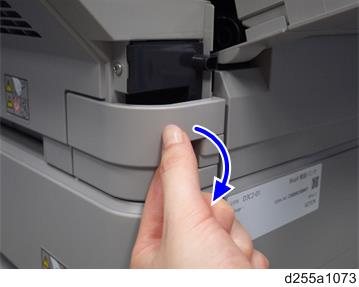
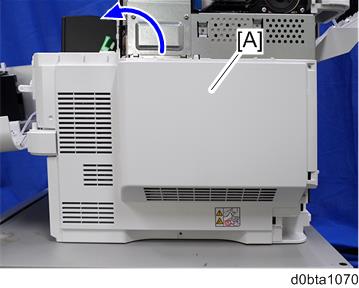
- Open the rear upper cover [A].
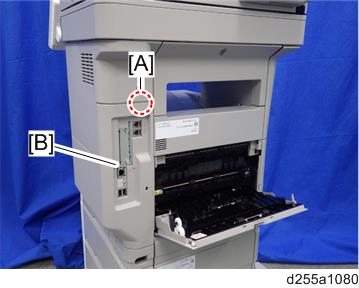
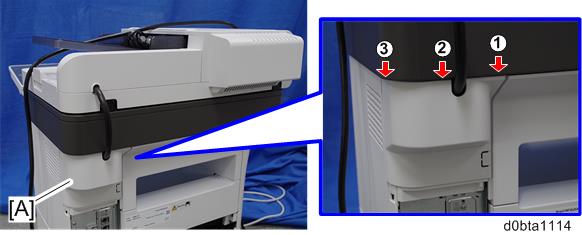
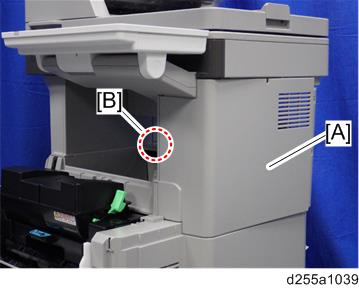
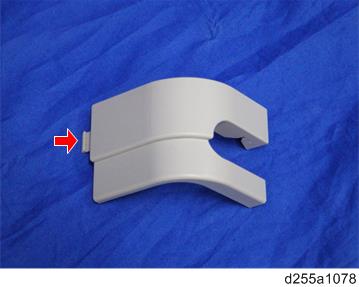
- Insert a flathead screwdriver into [A] to release the hook on the inside of the controller cover [B].
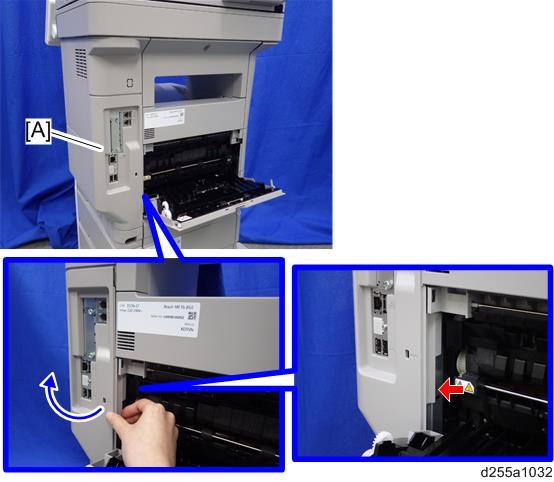
Release the hook by opening the right side of the cover, and then remove the cover [A] by rotating it in the direction of the blue arrow.

- Be careful not to damage the hooks on the inside of the controller cover when you remove or install the controller cover.
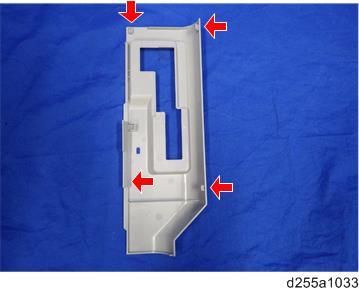
- Be careful not to damage the hooks on the inside of the controller cover when you remove or install the controller cover.
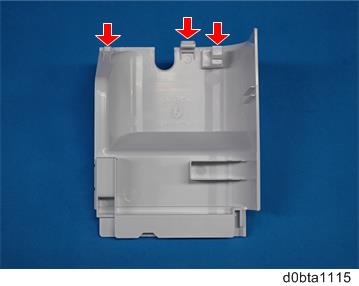
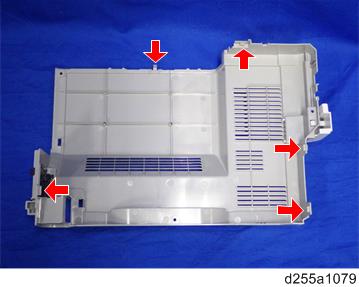
- Insert a flathead screwdriver in the order of
 ,
,  , and
, and  to release the three hooks of the rear left stay [A].
 Remove the rear right stay [A].
- Be careful not to damage the hooks on the inside of the rear left stay when you remove or install the rear left stay.
- Be careful not to damage the hooks on the inside of the rear left stay when you remove or install the rear left stay.
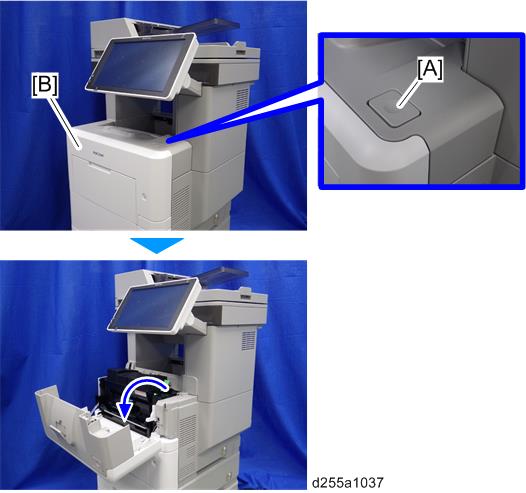
- Push the button [A] and open the front cover [B].
- Release the hook [A] of the right upper cover [B] by opening the cover in the direction of the arrow.
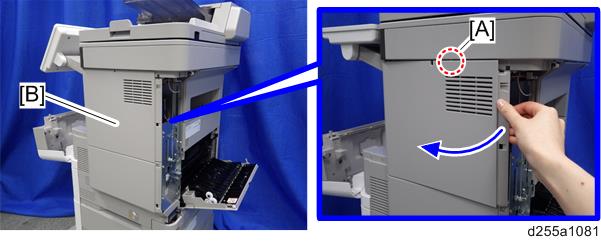
Remove the right upper cover [A] by inserting a flathead screwdriver into [B].
- Be careful not to damage the hooks on the inside of the right upper cover when you remove or install the right upper cover.
- Be careful not to damage the hooks on the inside of the right upper cover when you remove or install the right upper cover.
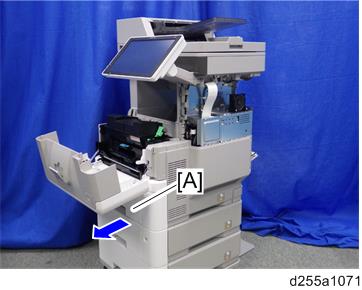
- Remove the paper feed tray [A] by pulling it out.
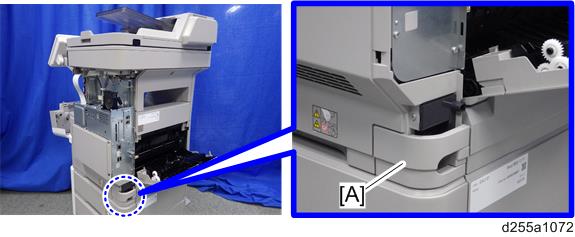
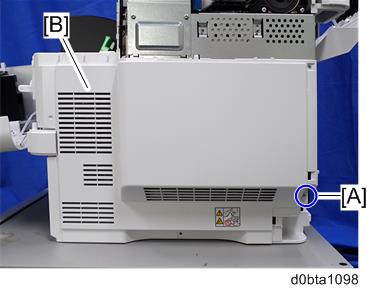
Remove the power connector cover [A].
- When removing the power connector cover, pull it in the direction of the arrow.
- Be careful not to damage the hook on the power connector cover when you remove or install the power connector cover.
- When removing the power connector cover, pull it in the direction of the arrow.
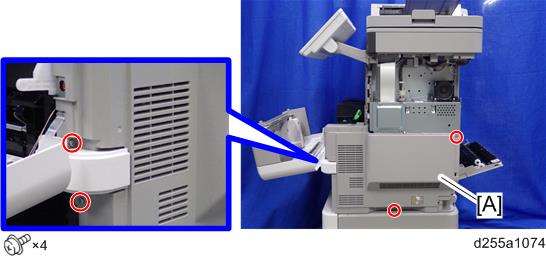
- Remove the four screws from the right lower cover [A].
- Close the rear upper cover [A].

- Open the rear lower cover [A], and then release the hook of the right lower cover [B] by rotating it in the direction of the blue arrow.

- Release the hooks [A] and [B].
Remove the right lower cover [A] by rotating it in the direction of the arrow.
- Be careful not to damage the hooks on the inside of the right lower cover when you remove or install the right lower cover.
- Do not remove the screw [A] when removing the right lower cover [B].
- Be careful not to damage the hooks on the inside of the right lower cover when you remove or install the right lower cover.
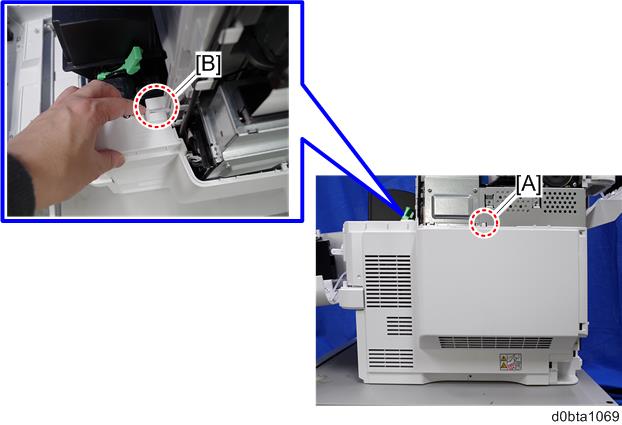
- Remove the bracket [A].
- Disconnect the USB connector [A] of the operation panel.
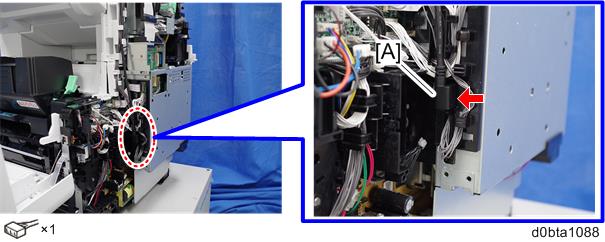
Disconnect the three flat cables and two connectors.
- Make sure to open the flap before disconnecting the flat cables [A] and [B], as shown in the following pictures. Otherwise, the connector may be damaged.
- When disconnecting the flat cable [A], pull it out in the direction of the arrow.
- Make sure to open the flap before disconnecting the flat cables [A] and [B], as shown in the following pictures. Otherwise, the connector may be damaged.
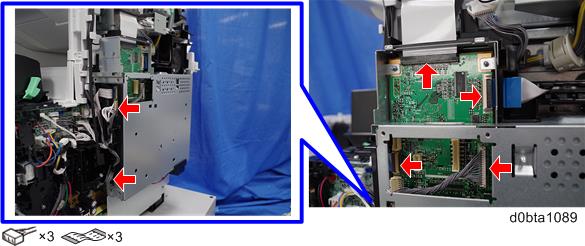
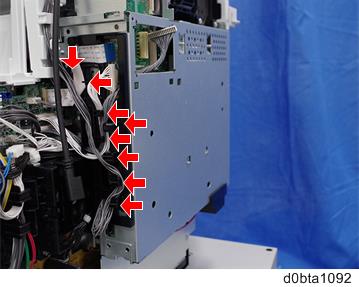
- Release the flat cable and harness from the harness guides.
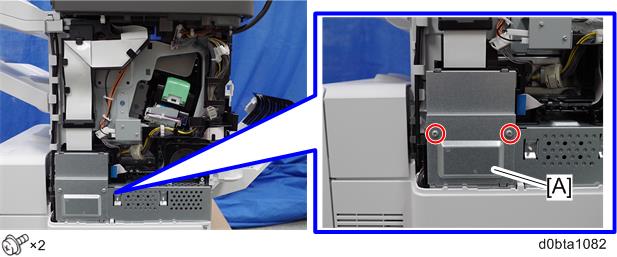
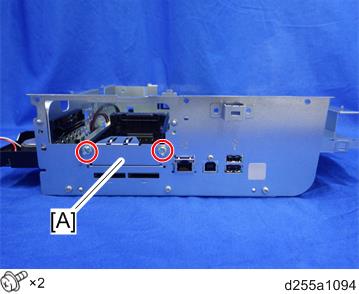
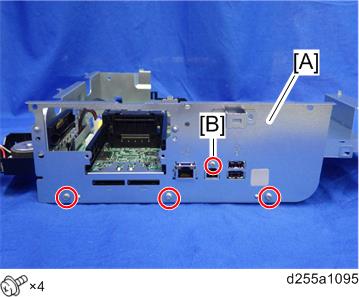
Remove the six screws from the controller box [A].
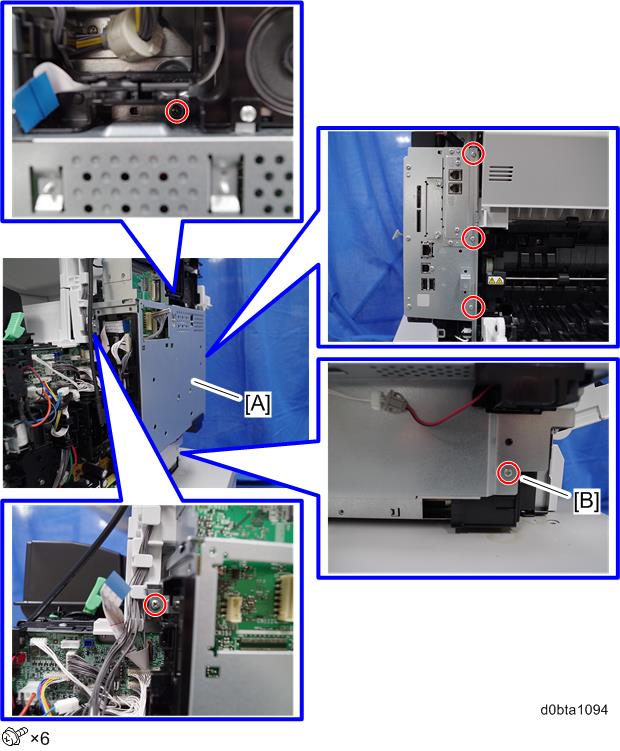
- The screw [B] is a tapping screw. Be careful not to use the wrong screw when installing the controller box.
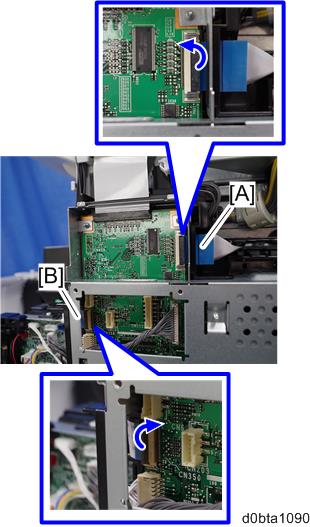
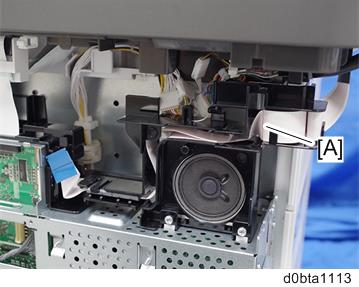
- Release the FFC [A] from the cable guides.
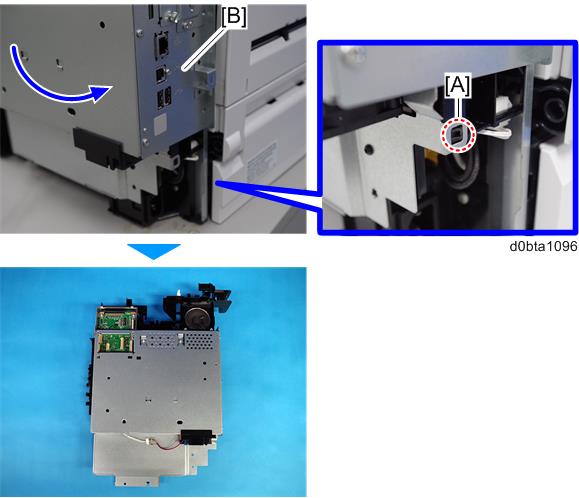
- Release the hook [A], and then remove the controller box [B] by rotating it counter-clockwise.
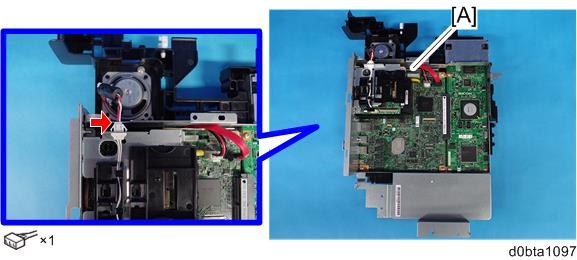
- Disconnect the connector on the controller box [A].
- Remove the fax unit [A].

- Remove the slot cover [A].
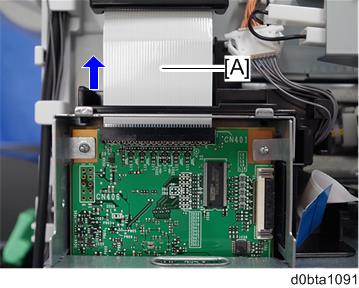
Remove the controller box cover [A].
- The screw [B] is a small screw. Be careful not to use the wrong screw when installing the controller box cover.
Remove the controller board [A] with the BiCU [B].
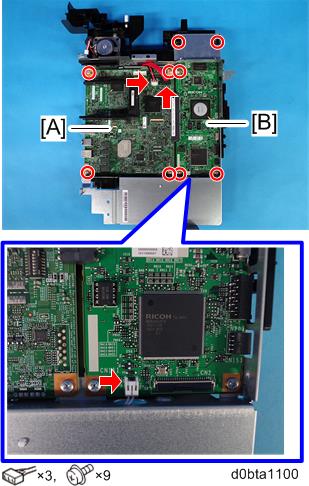
- Be careful not to damage the backside of the controller board [A] and the BiCU [B].
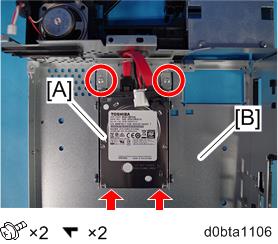
- Remove the HDD with the bracket [A] from the controller box [B].
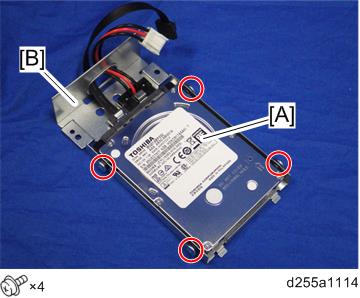
- Remove the HDD [A] from the HDD bracket [B].
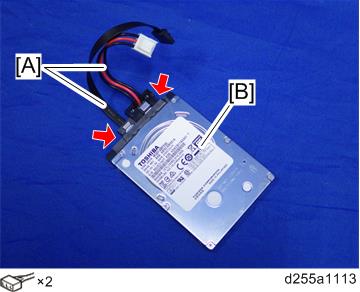
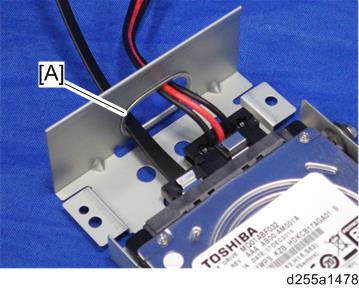
- Disconnect the two cables [A] from the HDD [B].
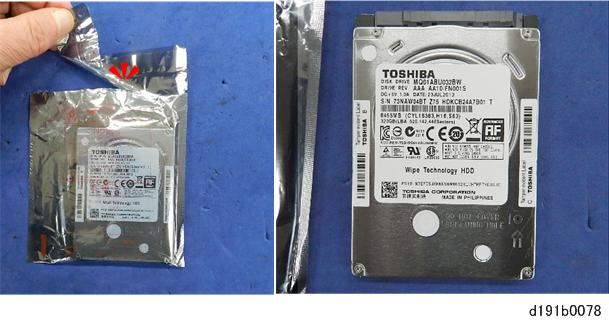
- Remove the enhanced security HDD from its protective pack.
- Connect the two cables [A] to the enhanced security HDD [B].
Install the enhanced security HDD [A] on the HDD bracket [B].
- When installing the enhanced security HDD on the bracket, make sure to pass the cables through the hole [A] of the HDD bracket.
- When installing the enhanced security HDD on the bracket, make sure to pass the cables through the hole [A] of the HDD bracket.
- Install the HDD with the bracket [A] on the controller box [B].
Reassemble the machine.
- When reattaching the controller box [A], make sure to secure the harness and flat cable to the harness guides, as shown below.
- When reattaching the bracket [A] of the controller box [B], do not interpose the harness and the flat cable between the bracket and the controller box.
- When reattaching the controller box [A], make sure to secure the harness and flat cable to the harness guides, as shown below.