- Turn OFF the main power.
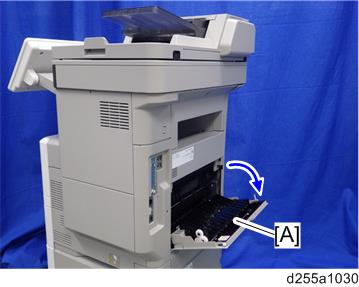
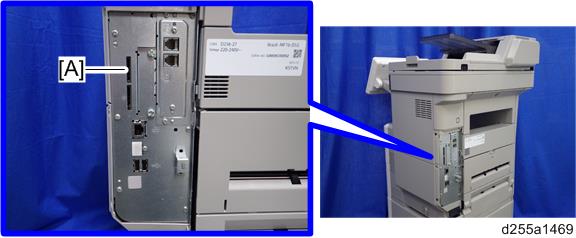
- Open the rear upper cover [A].
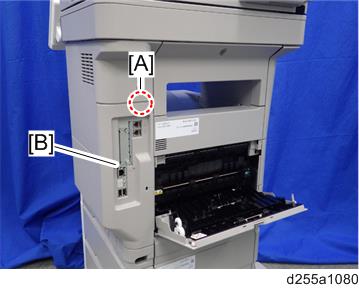
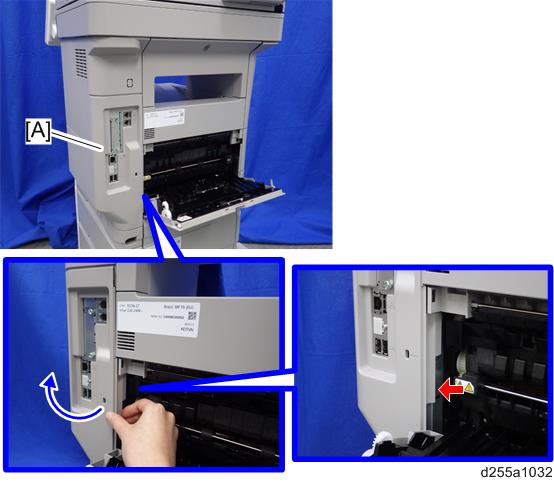
- IM 550F/600F: Insert a flathead screwdriver into [A] to release the hook on the inside of the controller cover [B].
Release the hook by opening the right side of the cover, and then remove the cover [A] by rotating it in the direction of the blue arrow.

- Be careful not to damage the hooks on the inside of the controller cover when you remove or install the controller cover.
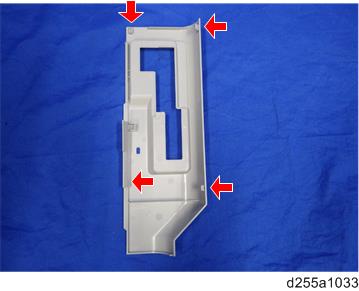
- Be careful not to damage the hooks on the inside of the controller cover when you remove or install the controller cover.
- Insert the OCR Unit Type M13 SD card in SD Card Slot 1 [A] (upper slot).
- Turn ON the main power.
- Press [Enter] in SP5-878-004 (Option Setup: OCR Dictionary).
The SD card ID is saved in the NVRAM, and the ID of the MFP is saved on the SD card. The MFP and SD card are thereby linked. When "operation complete" is displayed, press [Close].
- If the installation fails, "Failed" is displayed. Perform the following steps.
- Check whether it is a used SD card.
- Turn OFF the main power, and repeat steps 1-5.
- If the installation fails, "Failed" is displayed. Perform the following steps.
- Turn OFF/ON the main power.
Press [Enter] in SP5-878-004 (Option Setup: OCR Dictionary).
Dictionary data is copied to the HDD.- On the first run, SP5-878-004 links the SD card, and on the second run, copies dictionary data.
Turn OFF the main power, and remove the SD card from the SD card slot.
- Keep the SD card in a safe place. The original SD card is needed in the event of an HDD malfunction.
- Reattach the controller cover.
- Turn ON the main power.
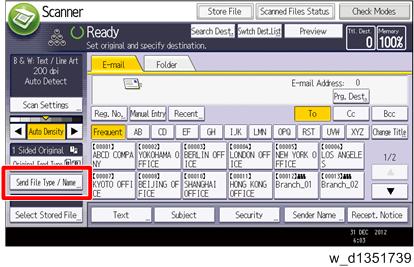
- Press [Send File Type / Name] on the scanner screen.
- Check if [OCR Settings] is displayed on the Send File Type / Name screen.
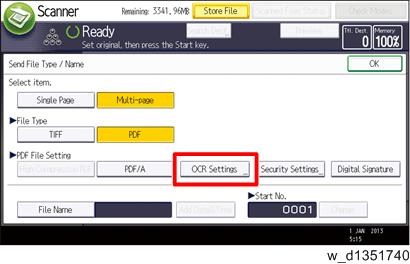
- After installation, the OCR setting can be changed on the "OCR setting" screen.
- When setting OCR, set [OCR setting] to [Yes]. (Default setting: [No])