When the stapled prints are not aligned adequately, it may be because the finisher side-to-side registration is inaccurate. Adjust the finisher side-to-side registration in the following way.
- Enter SP mode.
- Set SP6-138-001 to "1" (default: 0).
This configures the machine to stop the fed sheet at the finisher entrance. - Execute a print job using A4 or LT paper with the finisher selected as the paper output tray.
The printed sheet stops at the finisher entrance. - Remove the right upper cover. (Right Upper Cover (IM 600SRF))
- Remove the left upper cover. (Left Upper Cover (IM 550F/600F))
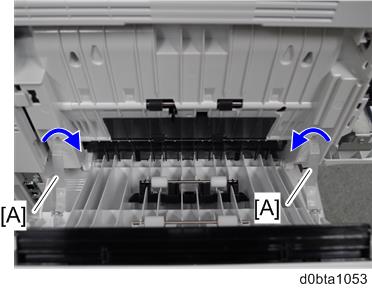
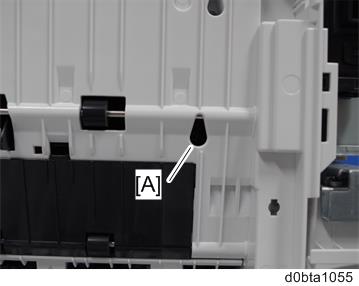
- Open the rear upper cover [A].

- Release the belts [A] from the mainframe by twisting the ends.
Remove the rear fan cover. (Rear Fan Cover (IM 600SRF Only))
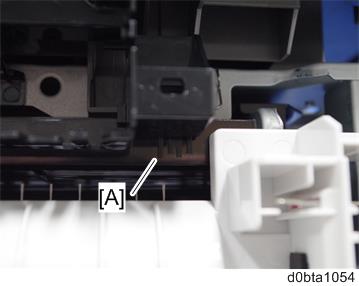
Compare the edge of the paper and the guidelines [A] to determine the required amount of adjustment.
When using A4 sheet When using LT sheet 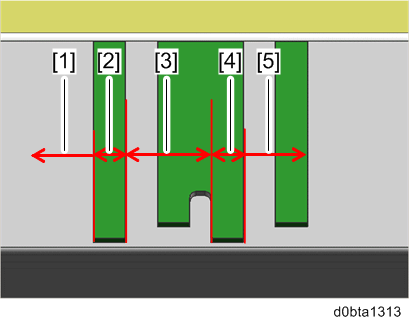
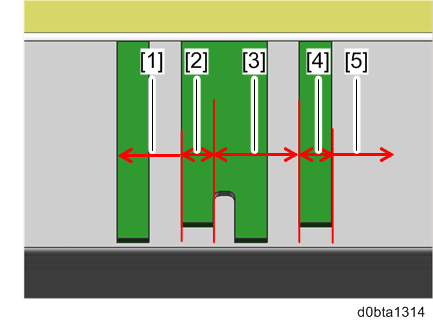
[1] Move the finisher to the right by 3 mm.
[2] Move the finisher to the right by 1.5 mm.
[3] No adjustment required.
[4] Move the finisher to the left by 1.5 mm.
[5] Move the finisher to the left by 3 mm.
* "Left" and "right" indicate the directions when seen from the front of the machine.
See below for how to determine the finisher position.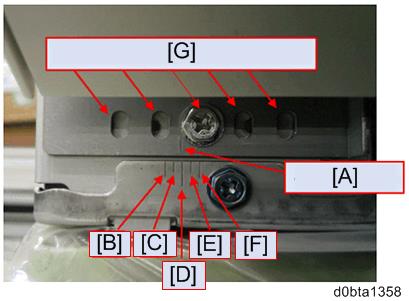
- Align the line [A] with one of the lines that matches the required distance.
[B]: 3 mm to the left
[C]: 1.5 mm to the left
[D]: Center position
[E]: 1.5 mm to the right
[F]: 3 mm to the right - Insert the screw to one of the five slits [G] which is aligned with a screw hole.
- Align the line [A] with one of the lines that matches the required distance.
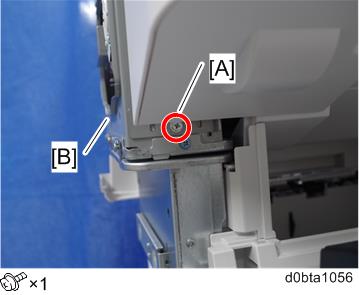
Put a screwdriver through the hole [A] and loosen the screw that fixes the finisher.
Remove the screw and slide the finisher [A] to the left or right according to the explanation in step 7.
After moving the finisher, reattach the screw in a new position according to the explanation in step 7.
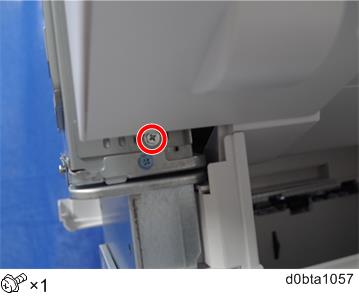
Put a screwdriver through the hole [A] and retighten the screw to fix the finisher.