- Install the heater board. (Heater board Installation)
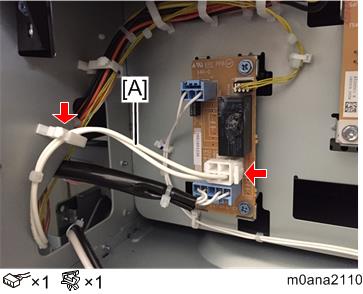
- Connect the PCU harness [A] to CN922 of the heater board and clamp the harness.
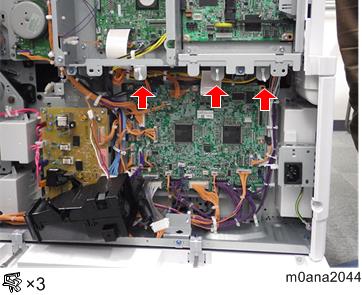
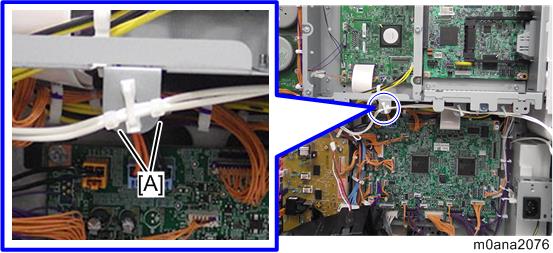
- Attach the clamps (provided with this unit) around the controller board in the rear main unit.
Route the heater cable [A] to the rear of the main unit.
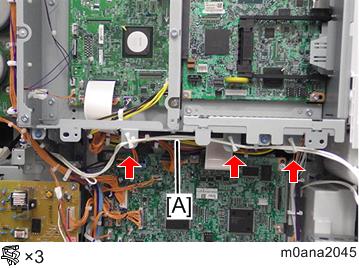

At the blue circle position shown below, position the clamp between the two cable ties [A].
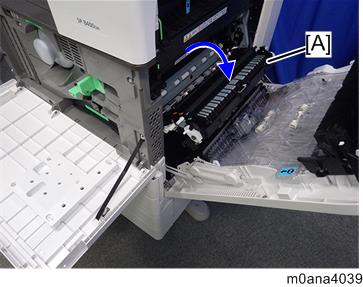
- Open the front cover.
- Open the right cover.
- Open the transfer unit [A].
Release the lever [A] then remove the PCDU [B].
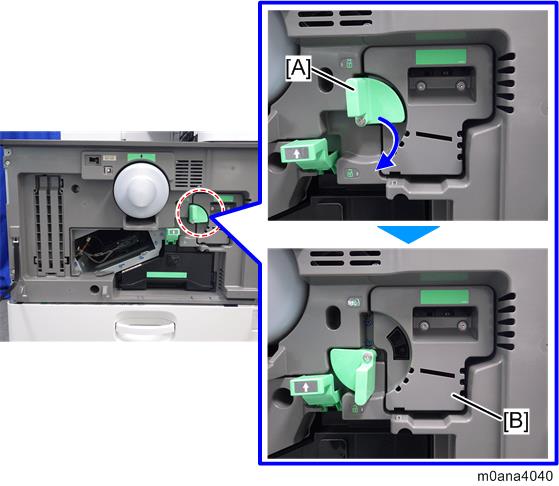
Carefully and slowly pull out the PCDU without tilting, to prevent toner spillage.
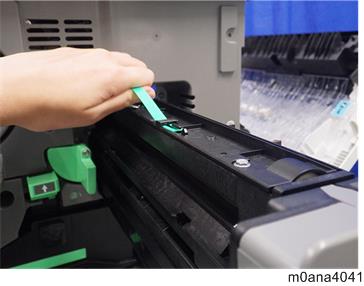
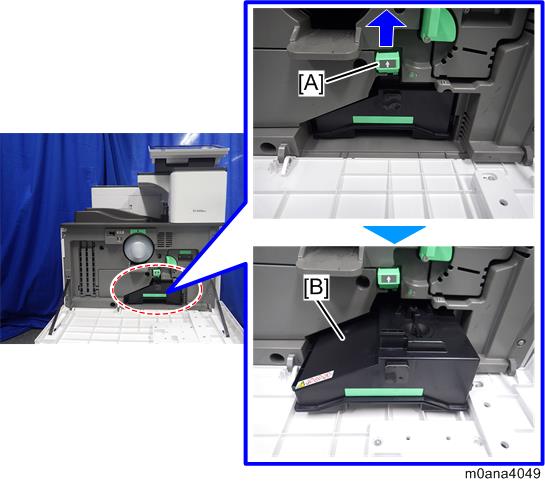
- Lift the lever [A] then pull out the waste toner bottle [B].
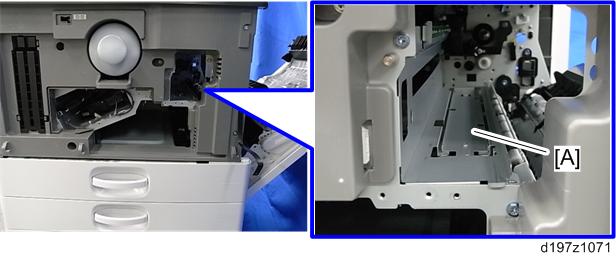
- Take off the heater bracket [A].
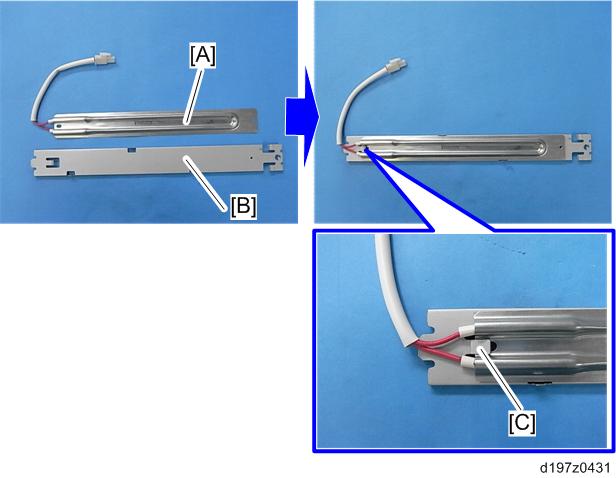
Attach the anti-condensation heater (PCU) [A] to the heater bracket [B].
- Fit the anti-condensation heater (PCU) [A] into the tab [C] on the heater bracket [B].
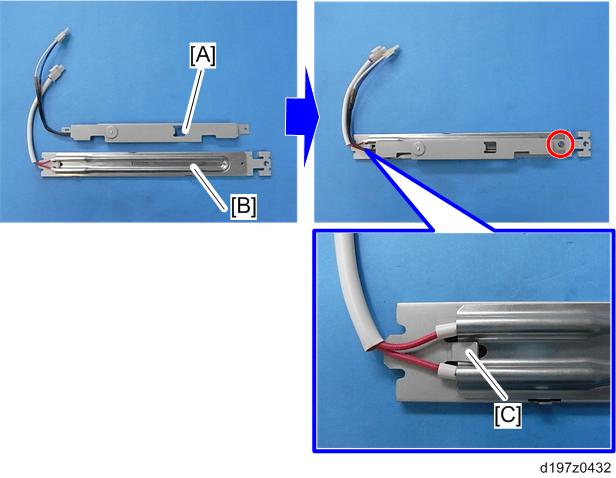
Attach the thermostat [A] to the anti-condensation heater (PCU) [B] (
 x1).
x1).- Fit the thermostat [A] into the tab [C] on the heater bracket [B].
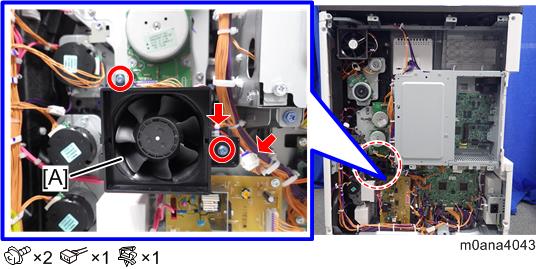
- Remove the development bearing cooling fan [A].
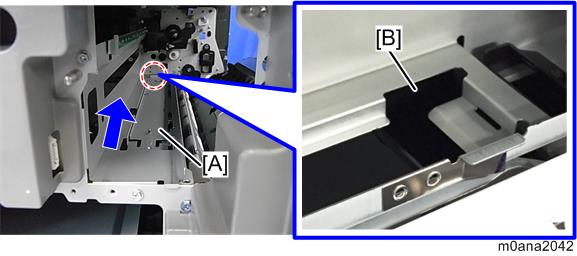
- Put back the anti-condensation heater (PCU) [A], and then pass the harness out through the guide [B] at the rear lower part of the PCU rail.
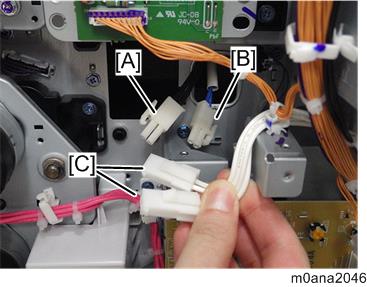
Connect the harnesses of the thermostat [A] and of the anti-condensation heater (PCU) [B] to the harnesses [C] which were routed in step 4.
- You can connect the harnesses [C] up to either harness [A] or [B].
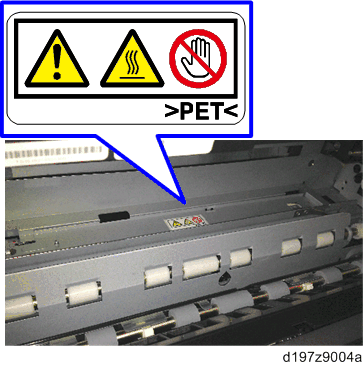
- Attach the DECAL:WARNING (HIGH TEMPERATURE) to the bracket.
- Attach the heater cover [A].
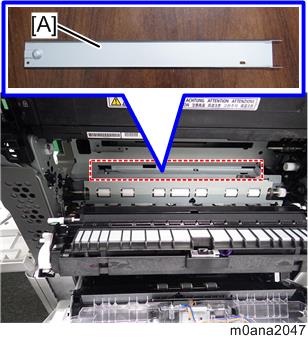
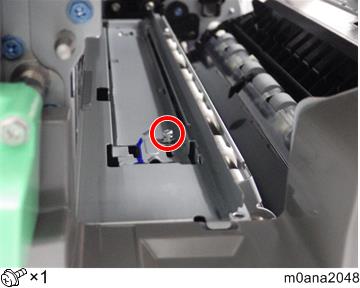
- Fix the anti-condensation heater (PCU) and the heater cover with the SCREW:SMALL ROUND/SPRING:M3X5 (provided with this unit).
- Reattach the development bearing cooling fan, PCDU, waste toner bottle, and all covers which have been removed.
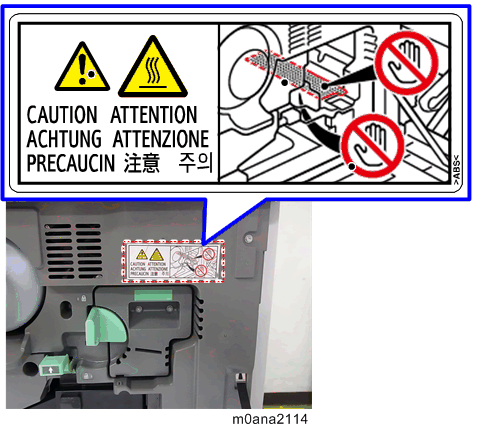
- Attach the DECAL:WARNING (HIGH TEMPERATURE) (HEATER OPTION).