
- When installing this option, turn OFF the main power and unplug the power cord from the wall socket. If installing without turning OFF the main power, an electric shock or a malfunction may occur.
- Before beginning work, ground yourself by touching something metal to discharge any static electricity. Static electricity can damage the HDD option.

- Do not give a physical shock to an HDD.
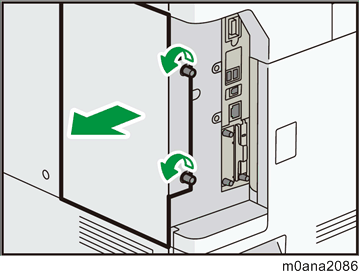
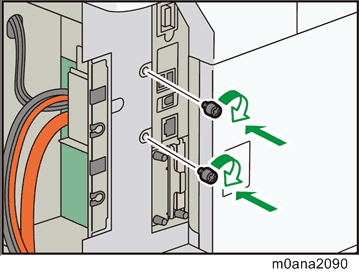
- Remove the rear left cover (coin screw x 2).
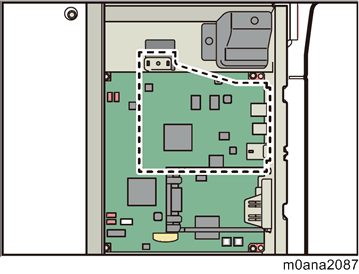
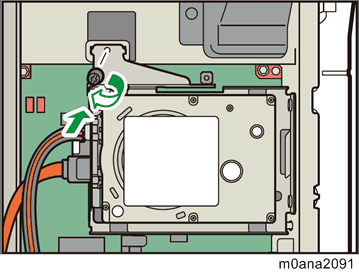
- Install the HDD option in the indicated position.
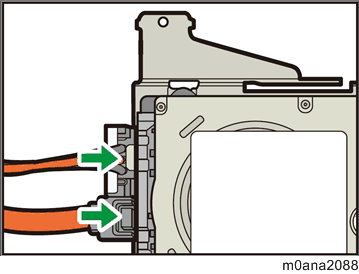
- Connect the power cord and FFC to the HDD option.
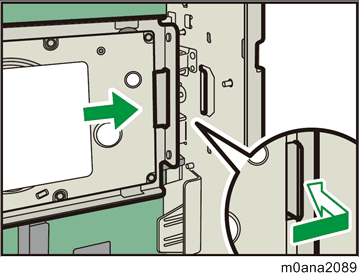
- Hook the mounting indents on the HDD option onto the tabs on the side frame.
- Fasten the HDD option (coin screw x2).
- Fasten the HDD option to the controller board (coin screw x1).
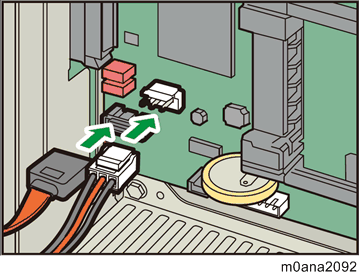
- Connect the power cord and FFC to the controller board.
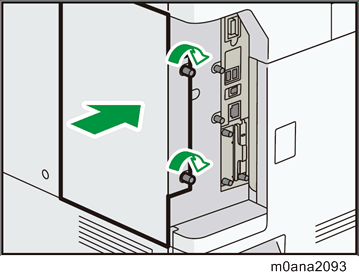
- Reattach the rear left cover (coin screw x 2).
- Turn ON the main power.
Initialization (formatting) of the HDD automatically starts. - Print out the "Configuration Page", and then check if this option is correctly recognized.
- User Tools > Machine Features > Printer Features > List/Test Page > Configuration Page
- Select "HDD" in "Advanced Options" tab of the printer driver.
Follow the procedure below on Windows 7 as an example;
(1) Point to the "Start" menu > "Devices and Printers", and right click the printer icon.
(2) Click "Printer Properties", and click the "Advanced Options" tab.
(3) Select "HDD".
Expand All
- Read This First
- Product Information
- Installation
- Installation Requirements
- Who Installs the Peripherals and Options
- Main Machine Installation
- Paper Feed Unit PB3240 (M494-17, -21)
- LCIT PB3260 (M496-17, -27)
- LCIT RT3030 (D696-17, -27)
- Anti-Condensation Heater
- Bridge Unit BU3070 (D685-18)
- Internal Multi-fold Unit FD3000 (M482-17)
- Finisher SR3230 (D3BA-17, -21)
- Output Jogger Unit Type M25 (D3CJ-01)
- Punch Unit PU3060 (D706-00, -01, -02)
- Finisher SR3210 (D3B8-17, -21)
- Punch Unit PU3050
- Mail Box CS3010 (M481-17)
- Attention Light AL3000 (M500-36)
- NFC Card Reader Type P11 (M512-18)
- External NFC Card Reader Bracket Type P11 (M512-17)
- Internal Options
- IEEE 1284 Interface Board Type M19 (D3C0-17)
- IEEE 802.11a/b/g/n Interface Unit Type M19 (D3BR-01)
- HDD Option Type P13 (M513-19)
- Extended USB Board Type M19 (D3BS-01)
- SD Card Options
- SD Card Appli Move
- PostScript3 Unit Type P13 (M513-22, -23, -24)
- XPS Direct Print Option Type P13 (M513-09, -10, -11)
- VM Card Type P13 (M513-25, -26, -27)
- IPDS Unit Type P13 (M513-13, -14, -15)
- @Remote Settings
- Operation Guidance for Users
- Preventive Maintenance
- Replacement and Adjustment
- System Maintenance
- Troubleshooting
- Detailed Descriptions