
- Before installing this option, turn OFF the main power and unplug the power cord from the wall socket. Otherwise an electric shock or a malfunction may occur.

- The USB Device Server Option has an IP address stored on the PCB. This is different from the machine's IP address. The IP address and other network settings of the USB Device Server Option must be configured after installing this option.

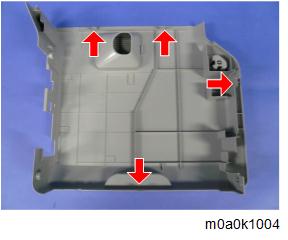
- There are four tabs on the back of the right cover.
- Turn OFF the main power of the machine.
- Unplug the power cord from the wall socket.
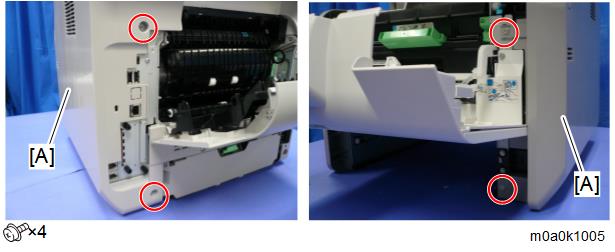
- Open the front cover.
- Open the rear cover.
- Remove the right cover [A].
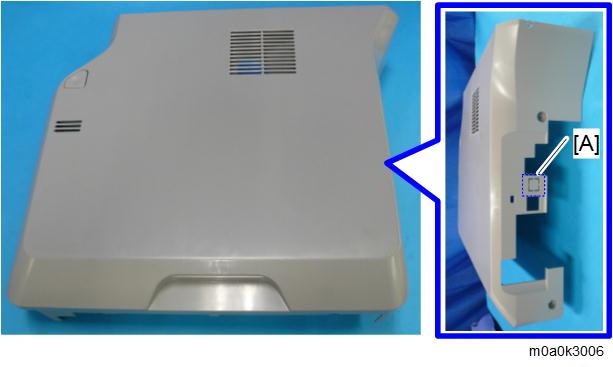
- Cut off the USB port cover [A] with nippers or other such tool.
- Reattach the right cover.
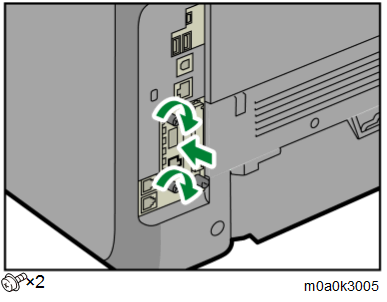
- Loosen the two screws and remove the I/F slot cover.
The removed cover will not be reused.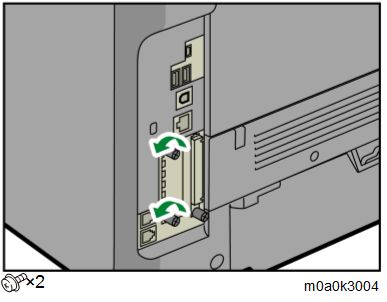
- Insert the USB Device Server Option board [A] into the I/F slot.
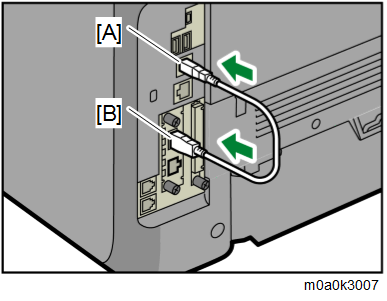
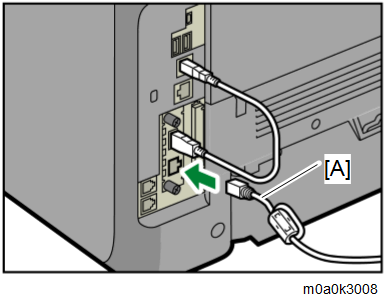
- Insert the USB cable [A] into the USB port (Type A) on the machine I/F.
- Insert the other end of the USB cable [B] into the USB port (Type B) on the USB Device Server Option board.
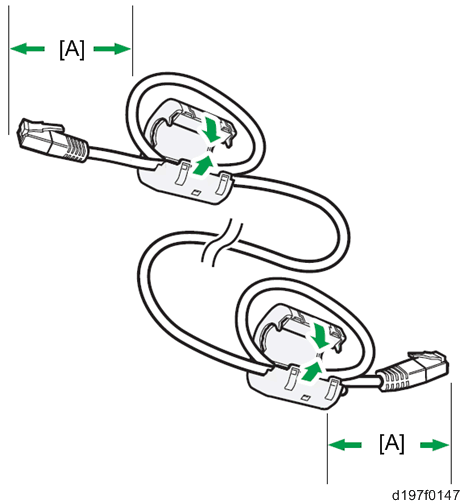
- Loop the cable at a point 3 cm (approximately 1.2 inch) [A] from each end of the Ethernet cable, and attach the ferrite cores to the cable
- (For North America only) Bind both cores with cable ties [A] as shown below.
Cable ties do not come with USB Device Server Option boards manufactured before March, 2015. For such option boards, use the ties supplied as service parts, or similar parts.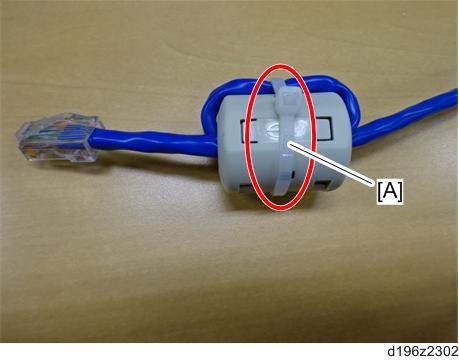
- Insert the Ethernet cable [A] into the Ethernet port on this option.
- Insert the other end of the Ethernet cable to a PC for network settings.
Plug the power cord into the wall socket and turn ON the main power of the machine.
- Do not unplug the USB cable while the machine is trying to identify the USB Device Server Option. If unplugged, connect the cable again.
- It may take between 30 seconds to 1 minute to finish identification (the LEDs on the Ethernet port of the option light up when identification is completed).
- To ensure that the machine recognizes the USB Device Server Option correctly, perform one of the following:
- Access the option’s IP address from a web browser.
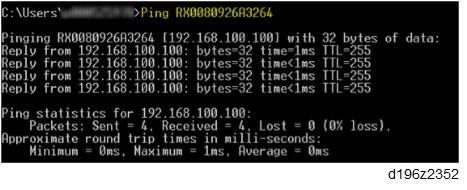
- Ping the option’s IP address from a command prompt on a Windows PC in the same network as the main machine.
If the IP address cannot be found (DHCP server), use the MAC address. This is the number printed on the seal attached to the printed circuit board for the USB Device Server Option.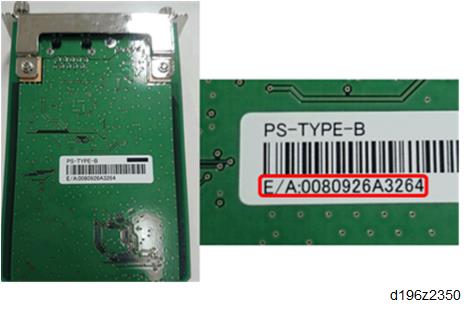
- Use "RX" + the option’s MAC address and access a web browser.
Example: http://RX0080926A3264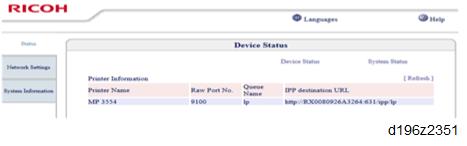
- Ping "RX" + "MAC address" from the command prompt on a windows PC which is on the same network as the mainframe.
- When installing the USB Device Server Option Type M19, the installation status is not shown on the Configuration Page.
- The customer should keep the slot covers which were removed.