- Remove the AIO.
- Only for MF models, remove the scanner unit (Scanner Unit).
- Remove the top cover (Printer models: Top Cover, MF models: Top Cover).
- Remove the fusing unit (Fusing Unit).
- Remove the PSU (PSU).
- Remove the HVP (HVP).
- Remove the by-pass lower guide plate (By-pass Feed Roller).
- Remove the paper feed clutch (Paper Feed Clutch).
- Remove the relay clutch (Relay Clutch).
- Remove the registration clutch (Registration Clutch).
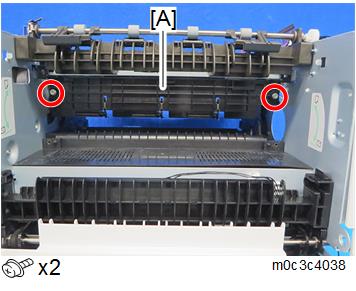
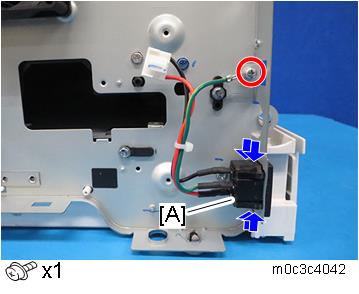
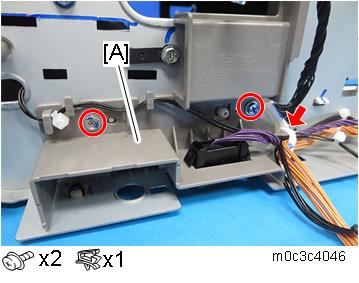
- Remove the heat insulating plate [A].
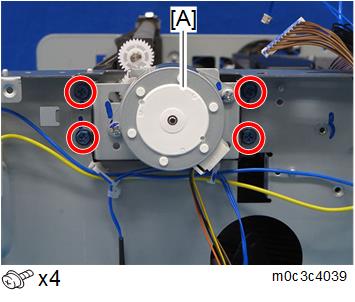
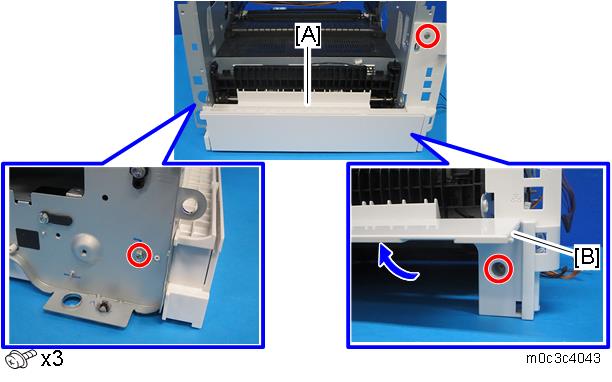
- Remove the duplex motor base [A].
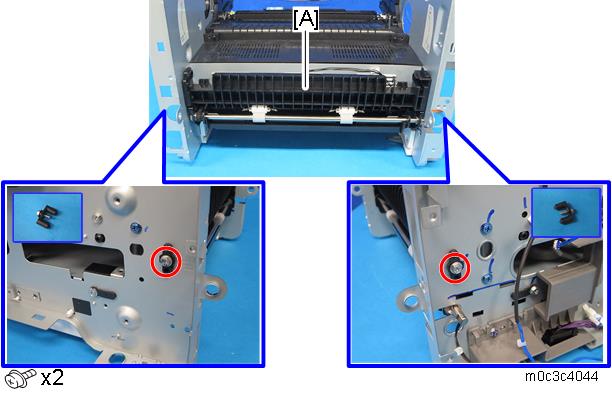
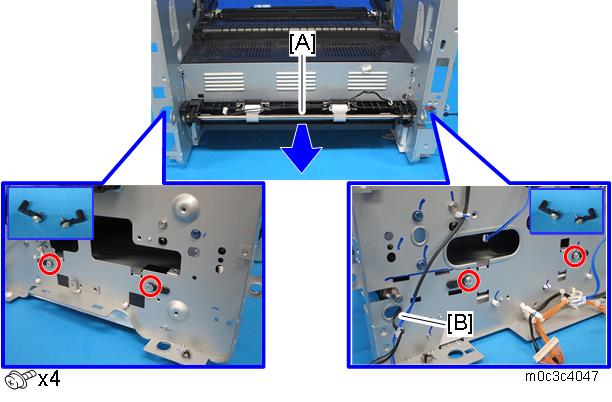
Slightly flex the side frames outward, and remove the exit roller base [A] and grounding plate [B].


When re-installing the exit roller base, remove the gear [C] temporarily so that it does not get damaged.
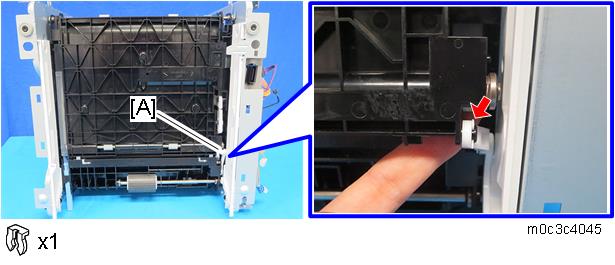
- Pass the harnesses through the hole inside the machine.
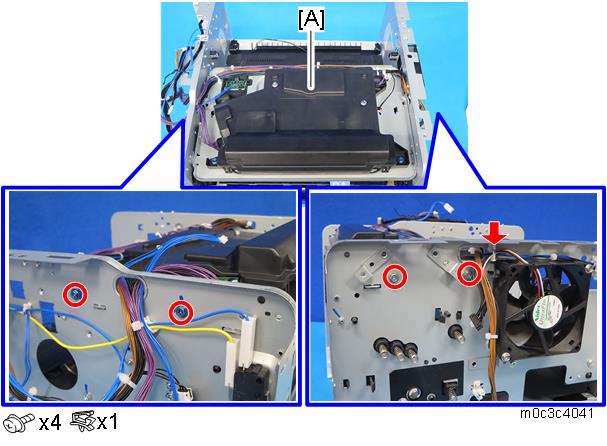
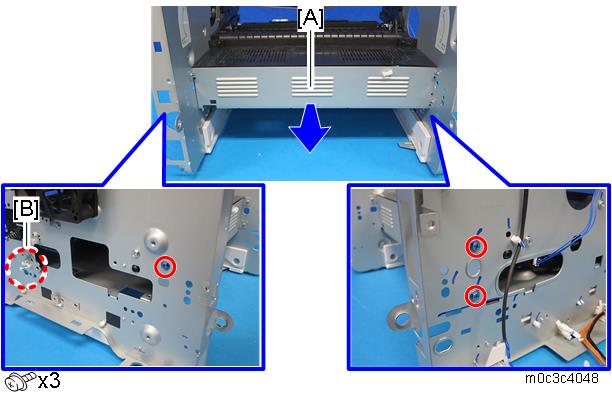
- Slightly flex the side frames outward, and remove the laser unit base [A].
- Remove the main power cord [A] on the right side.
- Remove the rear lower cover [A]. There is a screw behind the tray cover [B].
- Remove the bushings on both sides, and remove the duplex cover [A].
- Set the machine with the front side facing down, resting on the table.
- Release the link [A].
- Remove the bracket [A] on the left side.
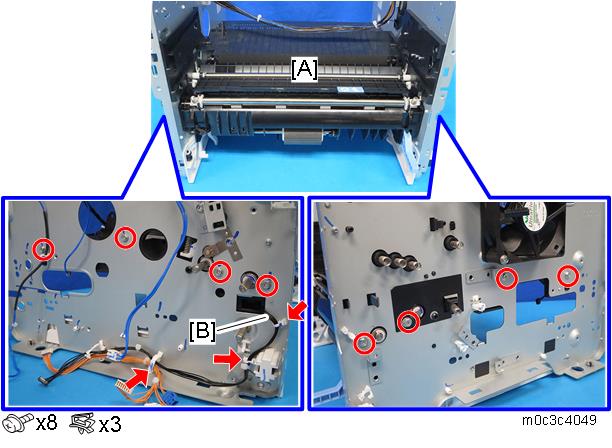
- Remove the bushings on both sides and pass the harness [B] through the hole inside the machine, and then remove the duplex transport guide [A].
- Remove the clamp [B], and then remove the bracket [A].
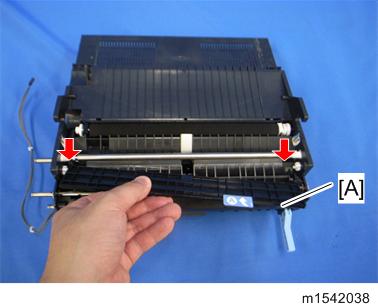
- Pass the harness [B] through the hole inside the machine, and remove the registration unit [A].
- Remove the upper guide plate [A] (2 hooks).
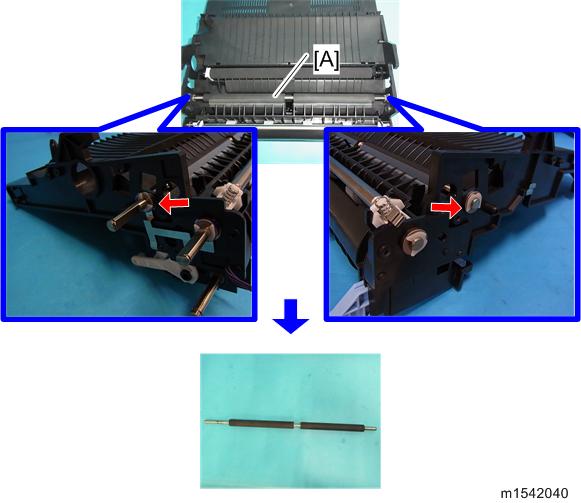
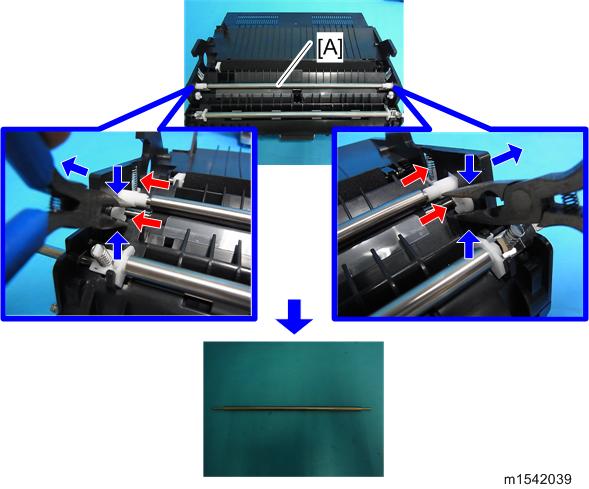
- Remove the registration roller (follower) [A] as shown below (spring x 2, plastic parts x 2).
- Remove the registration roller (drive) [A] (
 x 2, bushing x 2).