- Keep NVRAMs away from any objects that can cause static electricity. Static electricity can damage NVRAM data.
- Remove the controller cover. (Controller Cover)
- Remove the controller box cover. (Controller Box Cover)
- Remove the controller bracket. (Controller Bracket)
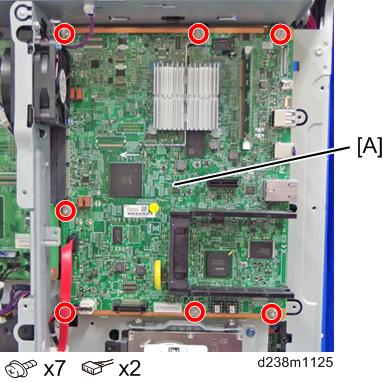
- Remove the controller board [A].
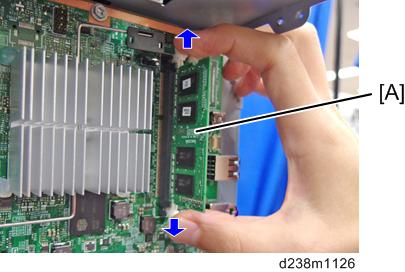
- Release the lock levers, and remove the DIMM [A].
Remove the two used NVRAMs from the old controller board and install them on the new controller board.
- Make sure that FRAM1 and FRAM2 are placed at the right position and orientation when attaching to the new board.
- Incorrect installation of the NVRAM will damage both the controller board and NVRAM.
Position
Label on the board
Label on the NVRAM
[A]
Left
FRAM1
2M-1
[B]
Right
FRAM2
2M-2
- When replacing the controller board, first, check which SDK applications have been installed. After replacing the controller board, re-install the SDK applications by following the installation instructions for each application.
- After reinstalling the SDK applications, print the SMC (SP-5-990-024/025 (SMC: SDK/Application Info)). Then open the proximity sensor cover. Store the SMC sheet and the SD card(s) that was used to install the SDK application(s).