- Remove the DF rear cover. (DF Rear Cover)
- Disconnect the harnesses and ground wires.
Use a self-tapping screw for the screw of the ground wire on the relay board.

- Disconnect the FFCs and harness for the relay board.

- Remove the harness box [A].

- Release the FFC with ferrite core [A] from the harness guide.

- Remove the two screws.

- Slide the rear left cover [A] towards you while pressing strongly with the thumb at the part marked with the red dotted circle.

- Slide the rear right cover [A] towards you (front) while pressing strongly with the thumb at the part marked with the red dotted circle. This cover slides only a little as shown in the photo below.

- Remove the screw of the scanner rear cover.

- Remove the scanner rear cover [A].

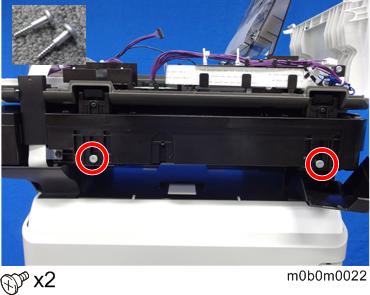
- Remove the two stepped screws.
- Remove the DF unit from the machine.
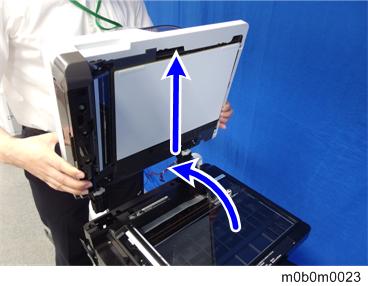

- When removing the DF unit, do not touch the sheet-through glass, mylar, and rollers (marked with red squares).

- Decals [A] [B] are not attached to the DF that you order for replacement. Order the decals also when replacing the DF.
