The PSU has residual charge even some time after the power turns off. NEVER touch the areas outlined in red in the photo below, to prevent electric shock caused by residual charge. After the removal, never place the board on an electrically-conductive surface, such as metal.
PSUs 1, 2 ,3 are all interchangeable.
- Remove the PSU box (PSU box)
- Open the clamps to free the harness.
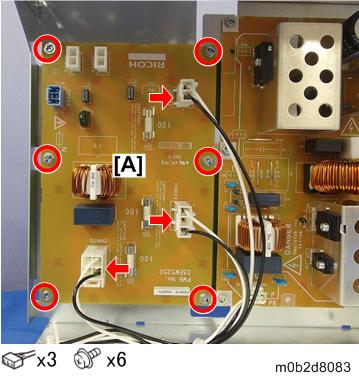
- Release the grounding wire and disconnect the connector [A] on the AC drive board, and then open the clamps to release the harness.
- Remove the screws on the top and side of the PSU left cover [A].
- Lay down the PSU box [A] to remove the screws on the lower side.
Open the clamp [A] to release the harness, and then remove the PSU left cover.
PSU1, 2, 3 / AC Drive Board Location
[A]: PSU 1
[B]: PSU 2
[C]: PSU 3 (Rear)
[D]: AC Drive Board (Front)To replace PSU 2 or 3, you need to remove the PSU(s) to the right of the one to replace.
- PSU 2 replacement: Requires removal of PSU 1.
- PSU 3 or AC drive board replacement: Requires removal of PSU 1 and PSU 2.
- Pull out the connector and remove the screws on PSU 1 [A], and then open the clamp at the rear corner of the bracket to detach PSU 1 with its bracket.
- Detach the board from the bracket.
- Pull out the connector and remove the screws on PSU 2 [A], and then open the clamp at the rear corner of the bracket to detach PSU 2 with its bracket.
- Detach the board from the bracket.
- Pull out the connectors and then remove the screws on PSU 3 [A], to detach PSU 3.
- Remove the AC drive board.
Replaceable fuses on PSU 1, 2, and 3
| Fuse | |
|---|---|
| [A] | FU3: 10A, 250V |
| [B] | FU4: 10A, 250V |
| [C] | FU5: 10A, 250V |
Replaceable fuses on the AC drive board
| Fuse | |
|---|---|
| [A] | FU101: 10A, 250V |
| [B] | FU102: 10A, 250V |
| [C] | FU103: 10A, 250V |